Question

Export losing quality even using PNG and 2X higher


Show first post

93 replies

iago
  • New Participant
  • 18 replies
  • October 26, 2022

This is a workaround to solve that. Exporting a pdf first and then, from the pdf, export a PNG


Gleb
  • Power Member
  • 4706 replies
  • October 26, 2022

This “workaround” comes from not understanding how DPI and raster images in general work. Saving PNG PDF at 300dpi is equivalent to about 4x size export, so if you really need that huge PNG, just export from Figma at 4x and you’ll get the same result. No workarounds necessary.


jk11
  • 1 reply
  • October 29, 2022

Hello,guys,i may have found the solution.
First, in the zoom column,click [pixel preview]1x or 2x.
Then-export ,click 1x or higher.
REMEMBER to select the # layer you need. (Left sidebar )

Otherwise,it may occurs that there are many pictures export,you thought you have set 2x,but only one picture changes.
In that export page,you could clearly see each picture’s resolution,which is marked in grey.


Scott_Owens

Same issue. @Gleb I get the hires export option but if I export 4x the image is literally 4x as big - dimensions and file size. I think everyone in this thread is expecting that, if they see an image in Figma that they have created, and export it to PNG 1x, it should look the same. I did that here. Top image is Figma, bottom image is Figma 1x export. We shouldn’t need a workaround here.


Gleb
  • Power Member
  • 4706 replies
  • November 10, 2022

Your screenshot is a compressed blurry jpeg but indeed I see some pixelation on the bottom picture. Without the original file and the explanation of how you exported this file it’s impossible to say why this happened. If you can share those I can explain what went wrong and how you can export the file correctly. Answers to these questions might help too:

  1. It seems like the original file is just an image (screenshot) in a frame: what are the dimensions of that frame? If you resized it down, obviously it would export smaller even though it looks good in Figma. You can enable pixel preview to make sure you see the image in Figma just as it would look when exported.

  2. Screenshots on Retina displays get resized down 2x while keeping the same resolution when you insert them into Figma. 100px screenshot becomes 50px object in Figma. Exporting such a screenshot at 1x would result in decreasing the original resolution by 2x. Did you account for that?

  3. Do you actually need to export? Is there any reason you are trying to export this frame instead of simply downloading the original screenshot from the Inspect tab? Unless you did some changes to it, you can just grab the original file.


Sony_Kadavan

Yes, this works.


Rafaela_Libano

Hi, I would just like to add my doubts here. What I don’t understand is how I can import a photo, have it look crisp at 100% with the pixel perfect setting on, make it smaller to fit into a mask and then have it look pixellated. Why is it pixellated if it’s smaller than the original?
I think the main issue is not that people don’t know how DPI works. We are all used to seeing a picture in Photoshop and knowing immediately whether it is going to export pixellated or not because what we see is what we get. Why doesn’t Figma work that way? People have mental models and expectations and cannot be blamed if a new software doesn’t follow the norm and also doesn’t communicate it. From a user perspective, I shouldn’t have to export an image at 4x to have it look as good as it looks at 1x in the software I’m using.


Gleb
  • Power Member
  • 4706 replies
  • February 23, 2023

It does if you enable Pixel Preview setting in View menu. It doesn’t work like this by default because it’s a vector software with the focus on UI design.

Regarding your downscaled image issue, feel free to share an example and I’ll explain why it’s pixelated.


Custom_For_All

Just to add a word here, comparing exports side by side between Figma and photoshop, Figma produces larger files that are inferior in quality. Of course photoshop also has 8-BIT PNG option which helps reducing the size as well as “Sharper” option. Left to right, photoshop, 10kb size, then Figma 30kb export of the same resolution.
compare


Rafaela_Libano

It’s just bad usability to have no explanation in the onboarding or during your first export about this very important aspect of UI design. Even just having the pixel preview setting on by default would probably clear up half the doubts I see around this issue. I’ve reached out to support about this a while ago and didn’t get a response that properly explained this behaviour. Your replies here are by far the clearest I’ve seen regarding this and it’s still confusing to so many users.

As for my image issues, I didn’t necessarily want a response about that specific photo, I was asking in a more general sense why a picture would lose quality when downscaled. But if it helps to visualize it, I made this file with an example that you can take a look at.

My main concern with this issue is: we make page layouts with a bunch of photos and masks that our devs then export and put on the actual webpage. Those images look much blurrier in the live site than on Figma and I would very much like to figure out a way to export the images as crisp as they appear on Figma.


Gleb
  • Power Member
  • 4706 replies
  • March 1, 2023

That’s what downscaling does to raster images. Less pixels = less quality.

Instead of exporting, they can just grab the original image in the Inspect panel (blue link under File Name):

They will also need to apply a mask in development though. If you need to export with the applied mask, export the image with the multiplier of whatever the downscale factor was. E.g. if you scaled the image down 2x, export in 2x. If you scaled it down to 3x, export at 3x.

Or use the original image width/height if you masked only one side, like in your example. The original was 2734px high, and you didn’t cut the height of the image by your mask, so you can export it with 2734h setting.

However you don’t need more than 2x for development purposes, since the high-definition computer displays (e.g. Retina) only have the “2x” resolution. So nobody would see anything more than 2x resolution without zooming in manually. And with higher size export you are slowing down the load times of your page on the web. As an example, if your image is 200px in size in development, it should at most be exported at 400px.


Apologies if this has been explained earlier. I have a 300x300 base image. I want a 2x retina image at 600x600. Is this possible with Figma


Gleb
  • Power Member
  • 4706 replies
  • March 13, 2023

Of course, just export it with a 2x multiplier. However if the frame contains raster images that are smaller than desired resolution (meaning they weren’t scaled down 2x or more to fit into that 300px frame), they would be pixelated as it is not possible to upscale raster images without losing quality.


  • 1 reply
  • March 15, 2023

Yes, that’s precisely the issue we are discussing here. Is it feasible to choose the resolution while exporting png/jpg in 1x. Currently, the default resolution is 72, and there’s no way to enhance it.

This video shows how we can export a 1x png with a higher resolution by exporting it into pdf and convert into png. At least, it works, but Figma should be aware of it’s time-consuming especially since there are tons of icons that need to be exported in different sizes and resolutions.


Gleb
  • Power Member
  • 4706 replies
  • March 16, 2023

Figma is very much capable of that by default, just read my reply below that comment. If you have any difficulties let me know.


Hoff_Outsource

The problem may be related to video memory. With a large number of pages (several hundred or thousands), I have a very slow loading of images in high resolution. Moreover, when exporting a card, it can return to the preview state. In this case, with a card resolution of 1800x1200px, it was exported as 600x400px with the Nearest Neighbor image interpolation. Creating a new file and transferring pages there solves the problem (in my case).


Alex207
  • 1 reply
  • April 3, 2023

You can type 1000w or 1000h in Export tab for high quality png.


  • 1 reply
  • May 20, 2023

Thank you! You are the best!


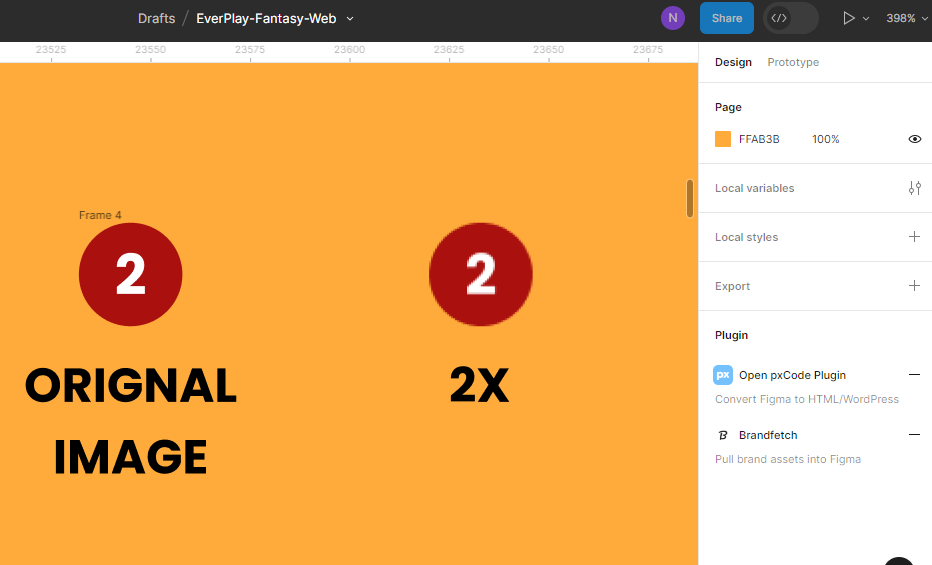
I have read all your comments related to this problem, but I didn’t understand what the solution to this problem is. I have a 26x26 size of icon and this is the 2x export result.


Gleb
  • Power Member
  • 4706 replies
  • August 2, 2023

Here is your problem:

image

You are viewing it at 400% size.


yes I am viewing it at 400% and I know that’s the problem. If I don’t view it at 400%, I won’t be able to determine the clarity of the icon. That’s why I have zoomed it in up to 400%. give me the solution to this issue.


Gleb
  • Power Member
  • 4706 replies
  • August 2, 2023

This is how raster images work. They consist of a fixed amount of pixels — exactly how many you specify on export. The quality can only be determined at 100% zoom, otherwise you are just enlarging pixels. There is not enough information in the image to show you the desired level of detail. If you need more detail and planning to view the image in this scale, you need to export at a higher resolution.

On the left you have a vector or a high-resolution raster image which doesn’t suffer from this scaling issue. There is enough information in it to show you a higher resolution at this zoom level (you can disable this behavior by enabling pixel preview as I suggested in the thread previously).


I didn’t understand what you are explaining. Isn’t there an easier way?


Gleb
  • Power Member
  • 4706 replies
  • August 3, 2023

You want the image to be 25x25 pixels (for example, not sure what exact dimensions are in your case). But at the same time you scale it to 100x100 pixels and say that the quality is bad. It doesn’t work like that, it can’t get those extra 75 px² from anywhere.

Also read up on the difference between raster and vector images, that would help you.

So in the end what you want is like printing an animated video on a sheet of paper — impossible, due to the nature of the medium. You either need to change the expectations or adjust the settings to fit your requirements.

Feel free to ask questions if anything specific is unclear, I’ll try to explain.


Rey_Alejandro1

I also think the expectation Photoshop set vs what Figma does is a factor for the confusion besides what you and @Gleb have already pointed out clearly.

If you have Macbook, a minimum of 2x is necessary to view the export unpixelated because of Mac’s retina display. This applies to other PCs too.

If you are printing it, just export it to 4x as mentioned above.

Thanks for the explanation @Gleb appreciate it.


Reply


Cookie policy

We use cookies to enhance and personalize your experience. If you accept you agree to our full cookie policy. Learn more about our cookies.

 
Cookie settings