Question

How to have background colour for text only and not the entire container using auto layout

  • June 22, 2021
  • 8 replies
  • 103209 views

Srish

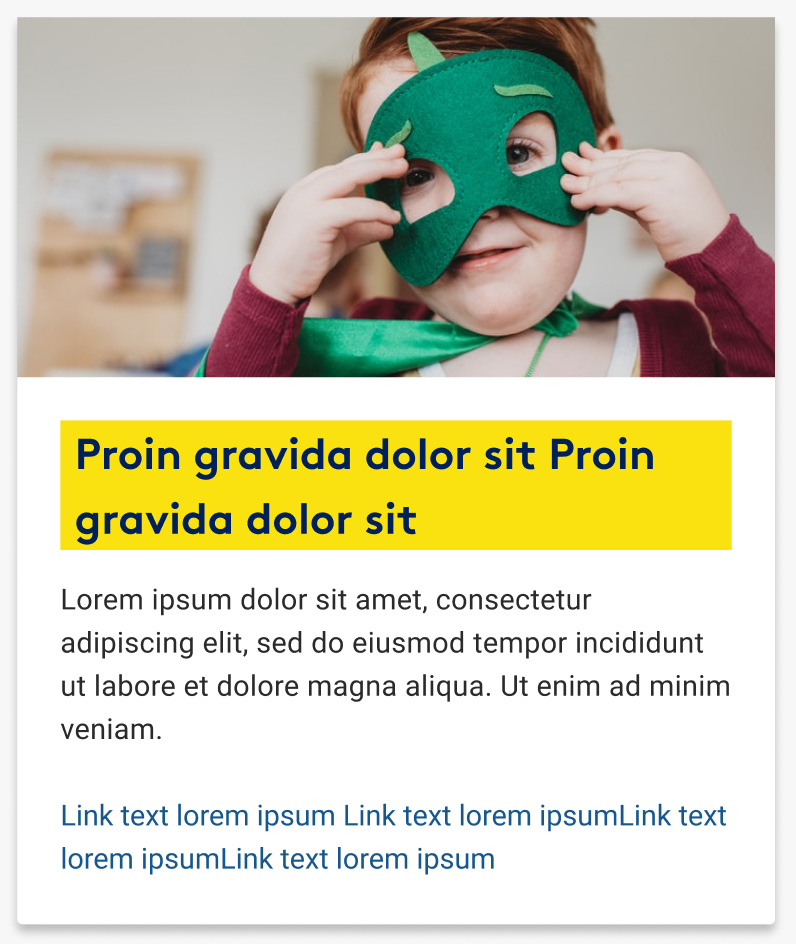
I would like to have text with background colour and I want the background colour to adjust according to the length of the text (Single line or multi line text). For e.g. I would like to create the card shown below with 2 lines of heading text having yellow background.

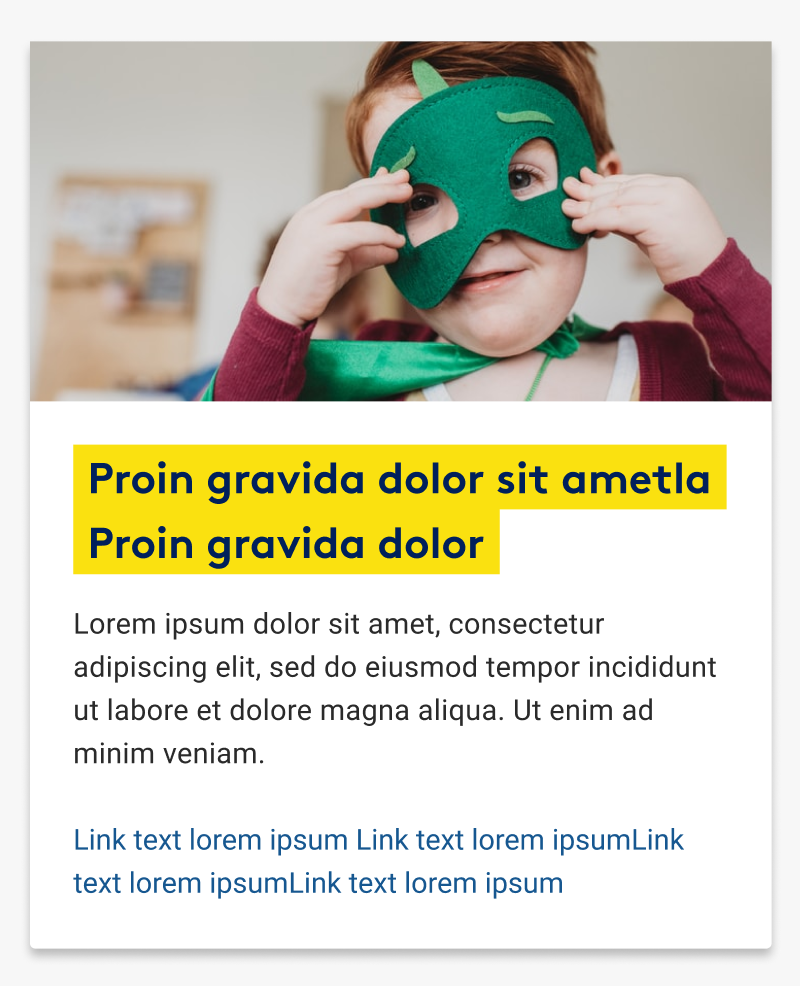
When I created the card using auto layout, the background colour filled the entire container of the heading text as shown below.

This topic has been closed for comments

8 replies

tank666
  • 4836 replies
  • June 22, 2021

Unfortunately, there are no such settings in Auto Layout or Text Layer. You need to add highlighting to the text yourself, for example by creating rectangles or frames.


Bruno_Figueiredo

Actually, there’s a way to do this but is basically a hack, here’s how you can do it 😃

Loom

Hop this helps


tank666
  • 4836 replies
  • June 22, 2021

Also, as a workaround, you can create a highlighter font. And you get something like this:
encode20210622202005


I also found one way to hack the auto layout, which I shared here:

Figma

But this method is not as flexible as the font creation method.


Srish
  • Author
  • 5 replies
  • June 23, 2021

Srish
  • Author
  • 5 replies
  • June 23, 2021

Thank you @tank666 This is exactly what I am looking for. When I use background fill for the text, it fills up the entire container so when I drag the container like you do in the video, the background colour fills up the whole container and not just the text. Can you please show me the steps to achieve the effect which is on your video?


tank666
  • 4836 replies
  • June 23, 2021

I created a font where each glyph is a rectangle that is taller and wider than the original text glyph (I used Roboto in my example). An example of such a font:

Installed this font to the operating system. Then in Figma I created a text layer with the font Roboto, duplicated this layer and changed the font to a highlighter font, and placed this text layer below the original one.

Thus, I got two text layers with the same text, but with different fonts.


Srish
  • Author
  • 5 replies
  • June 23, 2021

Thank you @tank666


  • 0 replies
  • July 23, 2021

This topic was automatically closed 30 days after the last reply. New replies are no longer allowed.


Cookie policy

We use cookies to enhance and personalize your experience. If you accept you agree to our full cookie policy. Learn more about our cookies.

 
Cookie settings