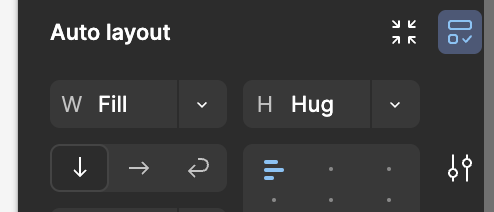
Yes, please. Seems like every single frame requires setting W:Fill, H:Hug, top/bottom paddin:.0, left/right padding:0, gap:0. That’s 7 clicks and 6 keyboard actions to set up constantly used autolayout behaviour and remove default paddings.
oh yes! I also wish we were allowed to set defaults rather than Figma deciding it for us!
Hey everyone, thanks for your feedback on shortcuts! We’ll pass this onto the team for consideration.
In the meantime, to cover some grounds, you can check below our video tutorial that may be helpful for you. (The tutorials explains how you can set auto layout frames to hug by double-clicking the bounding box, and set to fill by opt/alt + double-clicking the bounding box.)
Ever notice how seemingly everything in Figma takes multiple clicks and constantly going back and forth between the desing and sidebars. Compare, for example, to Onshape (3d cad program) where you click much less and your cursor stays above the design most of the time.
1.Using the Figma Plugin for Keyboard Shortcuts
Plugin: “Figma Shortcuts”
Usage: This plugin allows you to create custom shortcuts for various actions, which might help with Auto Layout adjustments.
- Quick Actions for Auto Layout
Feature: You can use Quick Actions to quickly toggle between different Auto Layout options.
Shortcut: Cmd + /
(Mac) or Ctrl + /
(Windows)
Usage: Type commands like “Auto Layout” to access related actions.
- Auto Layout Presets
Feature: Create and save Auto Layout presets for commonly used configurations.
Usage: Apply these presets to your frames to quickly switch between configurations.
- Customizable Hotkeys in Figma
Feature: Consider using a tool like AutoHotkey(Windows) or BetterTouchTool(Mac) to create custom keyboard shortcuts that can interact with Figma’s UI.
Usage: Set up shortcuts to navigate and adjust Auto Layout properties.