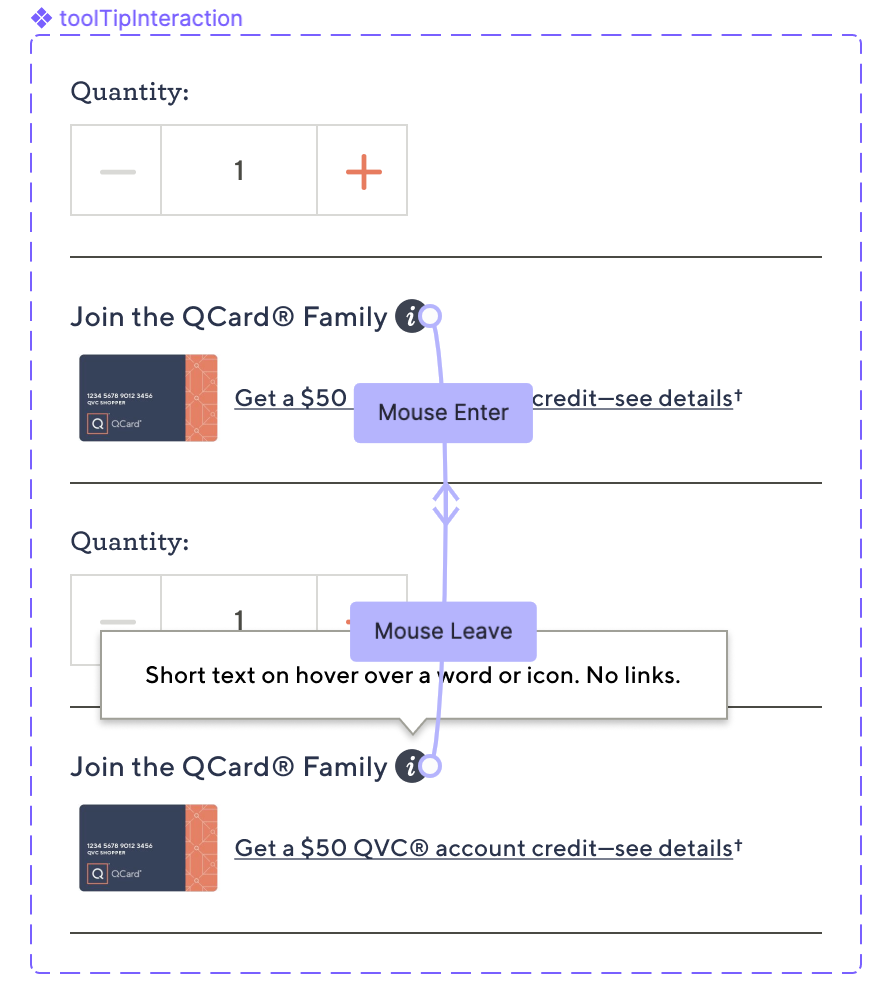
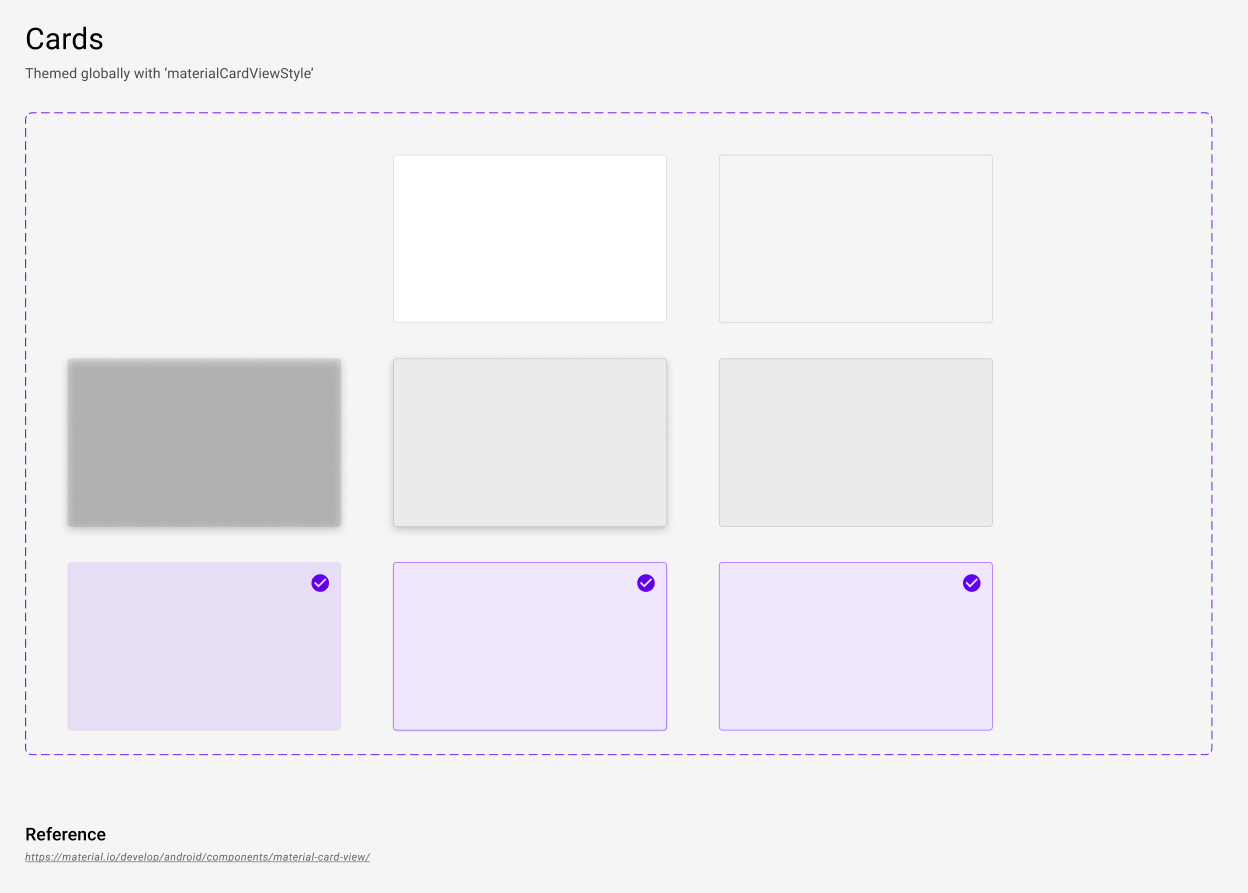
My personal use case: I use the Material Design guidelines and use surfaces or card-backgrounds to in my design. These components have states defined. When I change the corner radius, shadow, outline, or even the whole component itself, all elements that use that component as background should update accordingly.
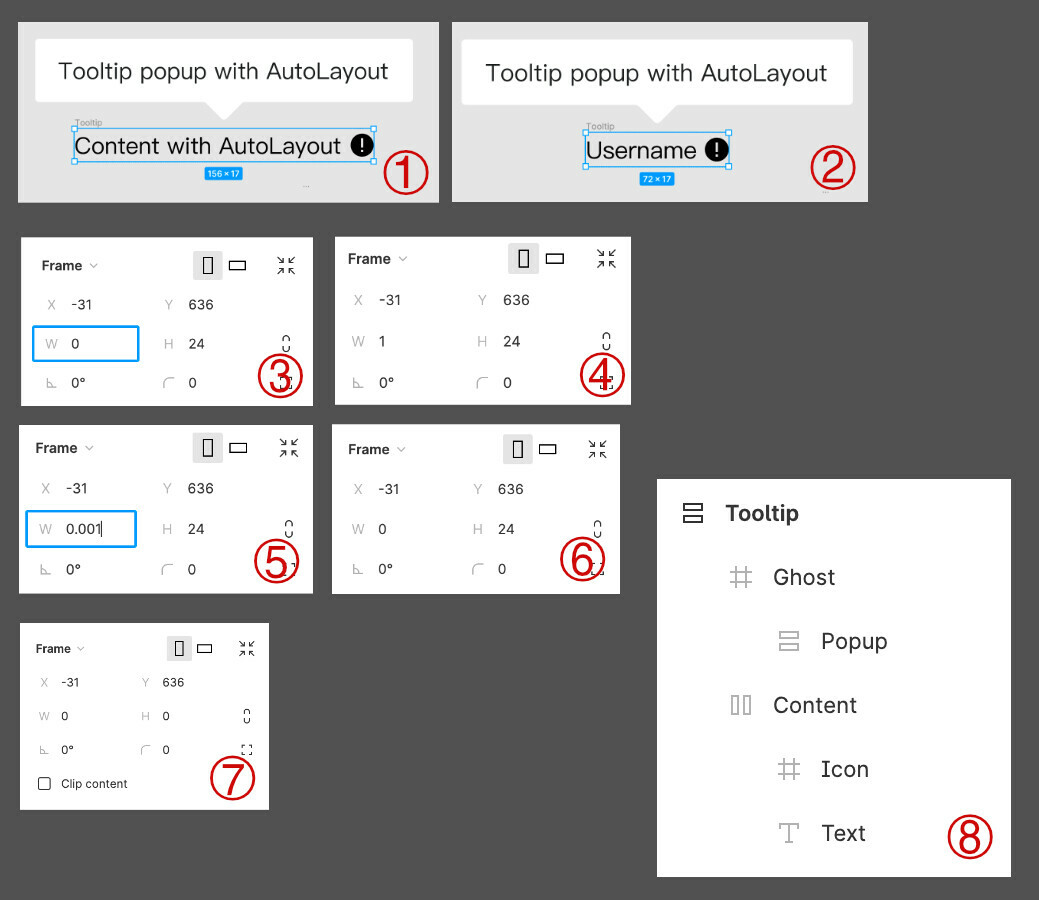
If you could exclude a layer from an AutoLayout Frame that would already help. So it doesn’t do this:
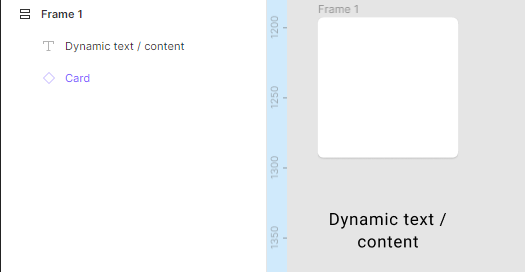
Auto-Layout is nice, I enjoy not having to resize my background all the time. And it works good for simple buttons, but more complex objects or just having the option to swap out the instance of the background component or deciding one day that I want my top right corners to be cut off at a 45 degree angle are sadly not possible.
It’d be nice to discuss possible solutions to this problem. Do you have ideas how to solve this problem? Me and many others agreed that it would bring Auto Layout to the next level. Especially when it is advised to make components out of everything to keep things atomic.
Have a wonderful day! 🙂