text variable issue

Please search for existing topics before posting! Press :mag: at the upper right to search.

Hello. I have a question about the text variable feature. I am creating a soundtrack page where the color changes to a light red when hovering, and to a darker red when clicked. I used the “click → change to” component for this. However, I want to use the text variable feature to change the title of the currently playing music when a track is clicked. But when I try to add a variable to the “click → change” action in the prototype animation, either the “change to” function doesn’t work, or the variable feature doesn’t work. Is it possible to implement both at the same time?

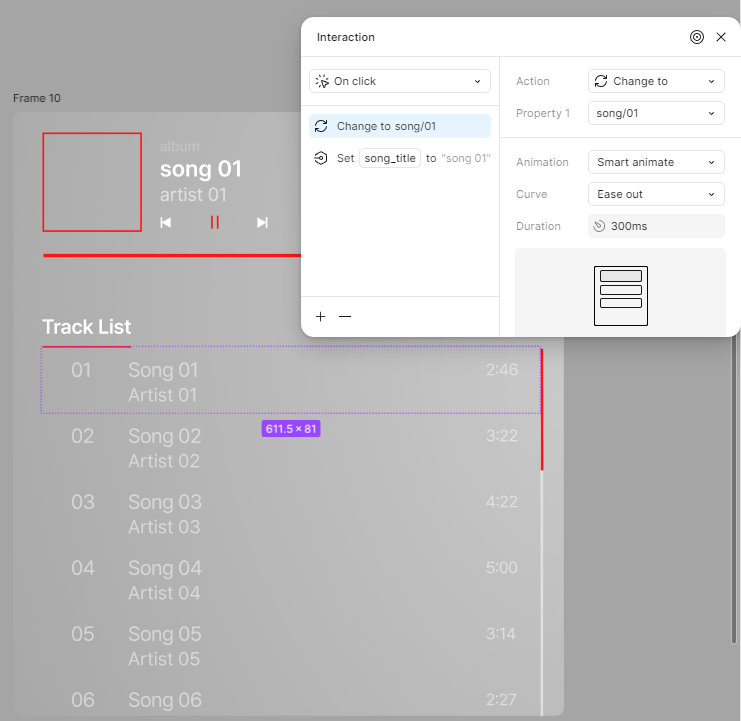
It is possible to use both text variables and the “click → change to” action in Figma simultaneously, but there are specific limitations and considerations when combining these features. Here’s how to implement it effectively:


Key Challenges:

  1. Conflicting Actions: When you use the “change to” action, it swaps the current component state, which might not retain the text variable data unless explicitly carried over in the swapped variant.
  2. Variables Scope: Text variables are tied to the state of the prototype and can be updated dynamically, but they must be referenced in each state of the component.

Steps to Combine Both Features:

  1. Set Up Variables:

    • Go to the Variables tab (accessible from the Assets panel).
    • Create a Text Variable (e.g., currentTrackName) to hold the title of the currently playing music.
  2. Design Your Component States:

    • Create variants for your button (e.g., Default, Hover, Clicked).
    • Ensure that the text element where you want to display the track name is linked to the currentTrackName variable in all states.
  3. Link the Text Variable:

    • In the Design Panel, select the text layer displaying the track title.
    • Under Content, set it to use the currentTrackName variable.
  4. Prototype the Interaction:

    • In Prototype mode, add the “Click → Change to” action to transition between the states (e.g., from Default to Clicked).
    • After defining the interaction, ensure the currentTrackName variable is updated when the button is clicked.

    Example:

    • For the Clicked state, use a second interaction:
      • Trigger: Click.
      • Action: Set Variable.
      • Variable: currentTrackName.
      • Value: Enter the new track name (e.g., “Playing: Track X”).
  5. Testing the Flow:

    • Preview the prototype.
    • When you click a track:
      • The button transitions to the “Clicked” state.
      • The currentTrackName variable updates dynamically.
      • The new track name appears wherever the variable is referenced.

Notes:

  • Ensure that all variants of the button component are set to reference the currentTrackName variable, so the text persists across state changes.
  • If you experience conflicts, try adding a delay or sequencing the actions to ensure the variable update doesn’t interfere with the state transition.

By combining state changes and variable updates, you can achieve a dynamic soundtrack page where the button changes color and updates the currently playing track title. Let me know if you need a more detailed walkthrough!