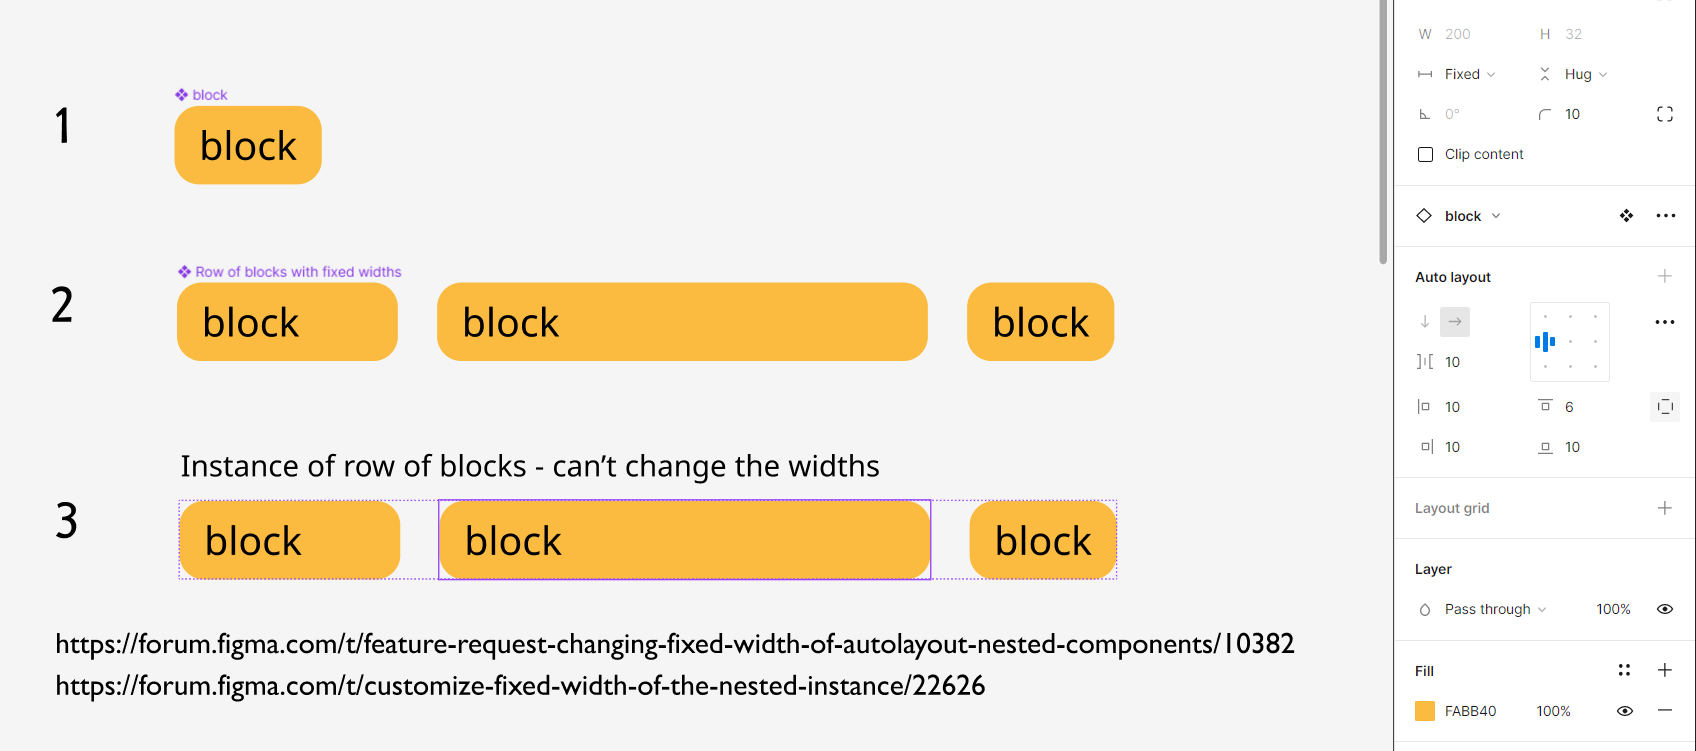
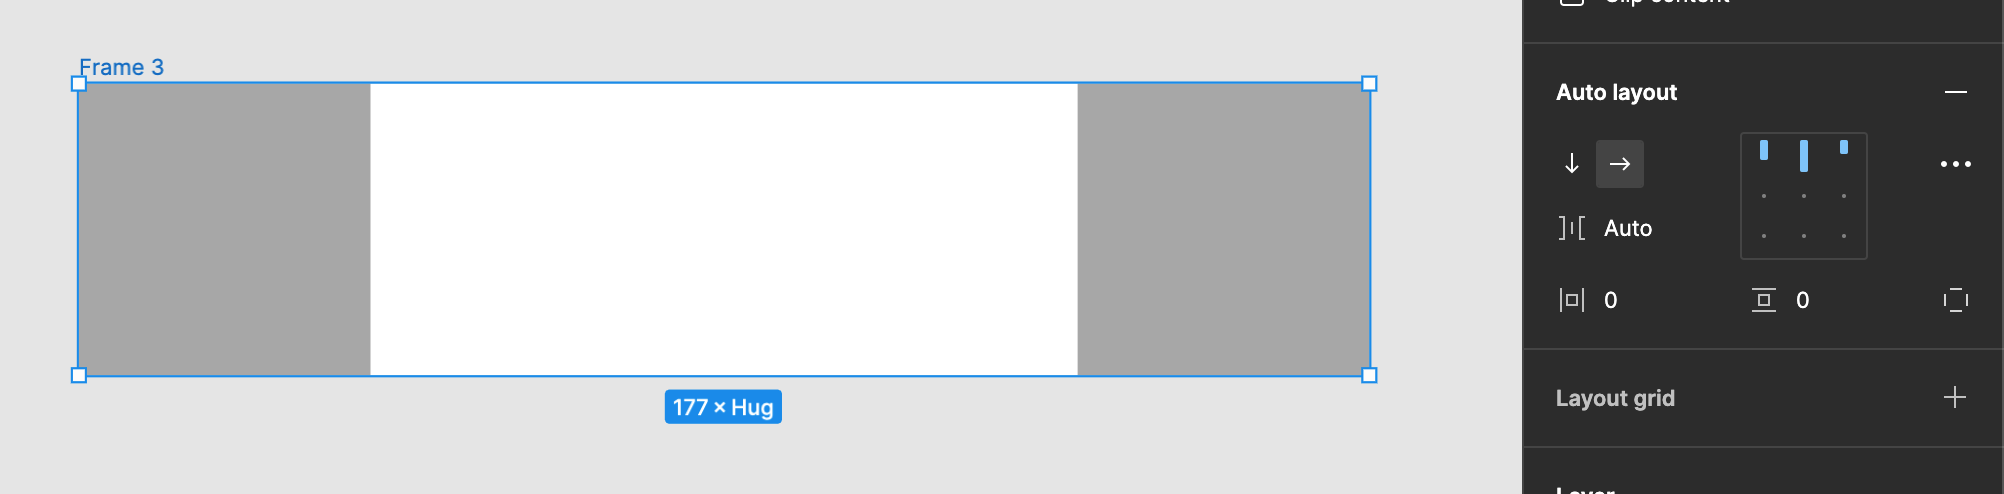
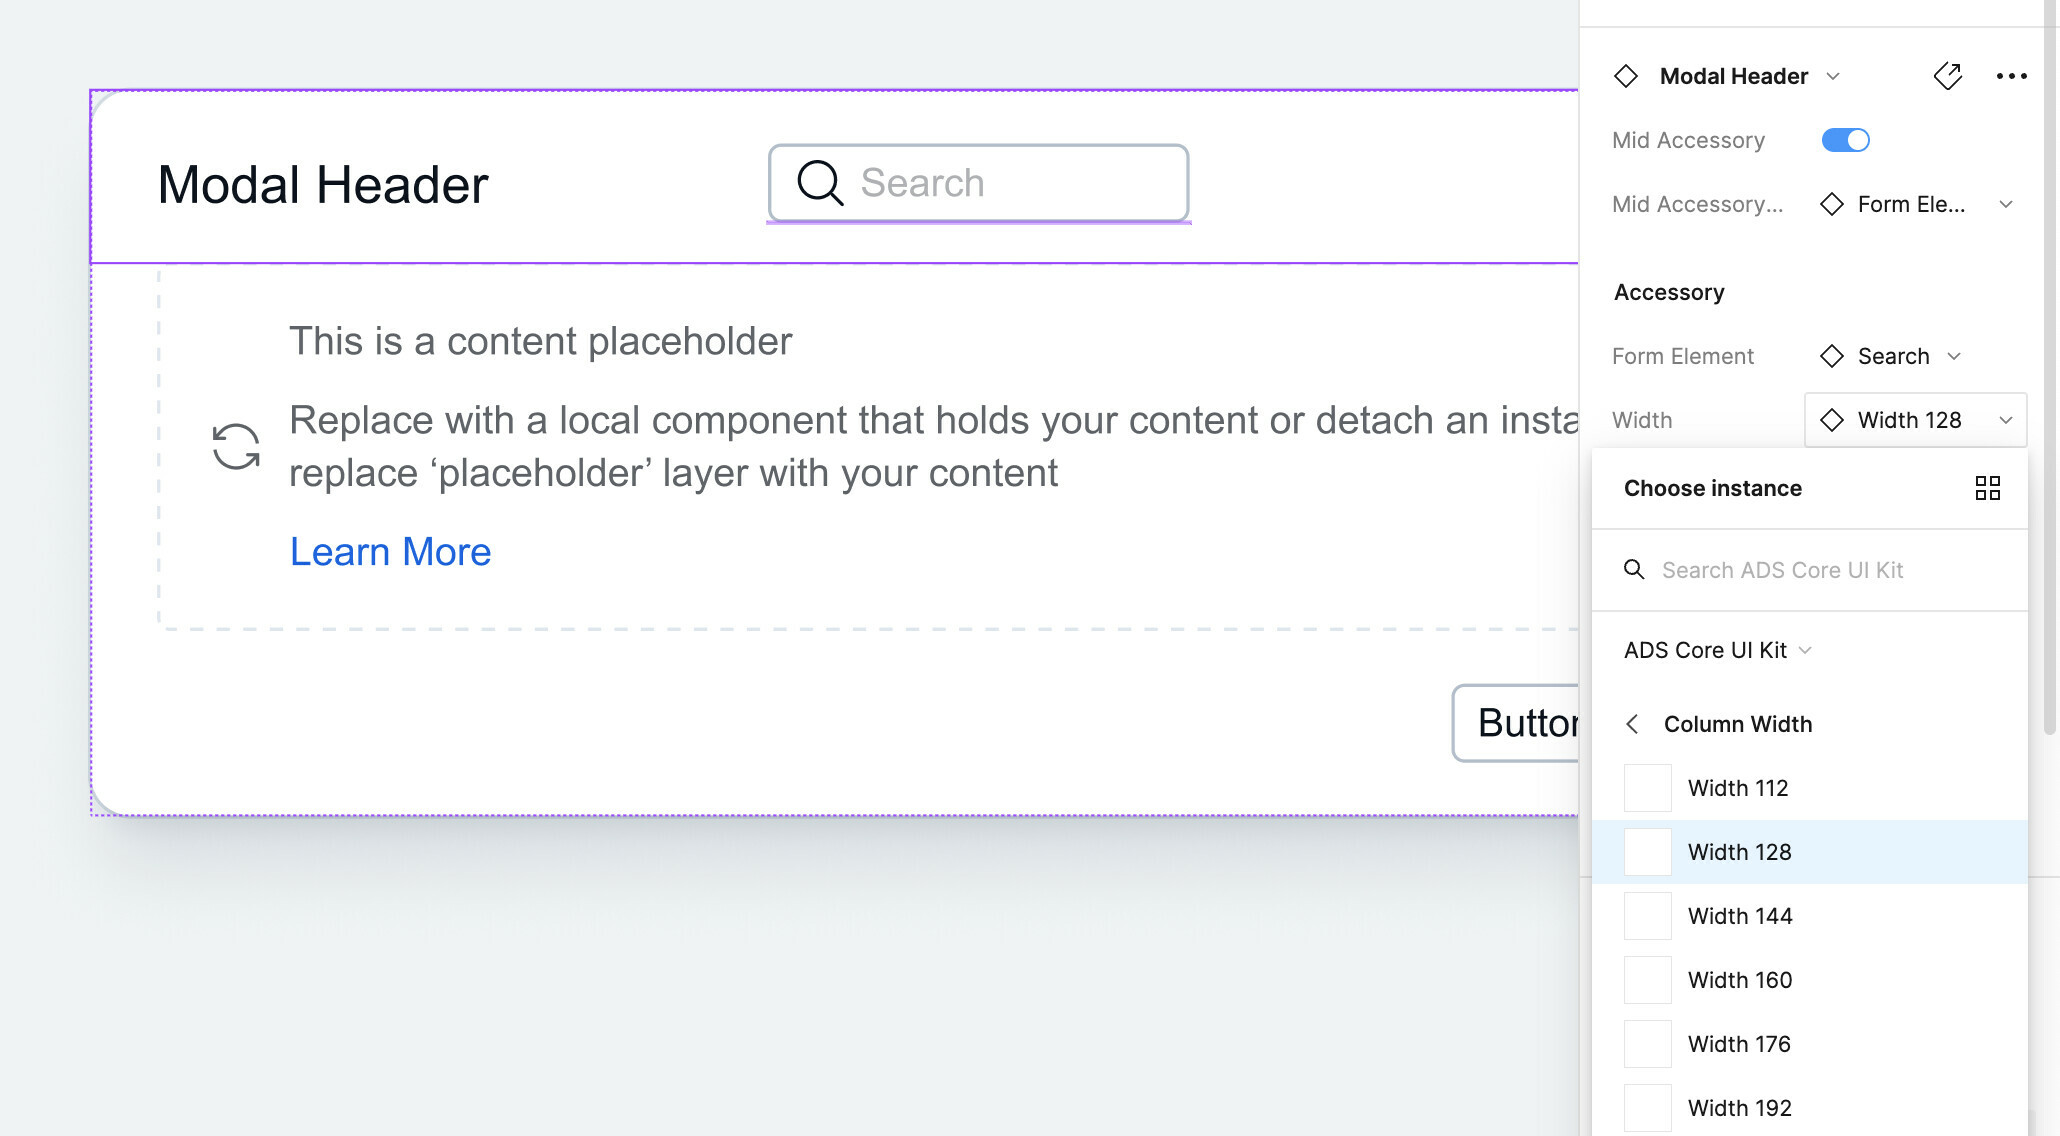
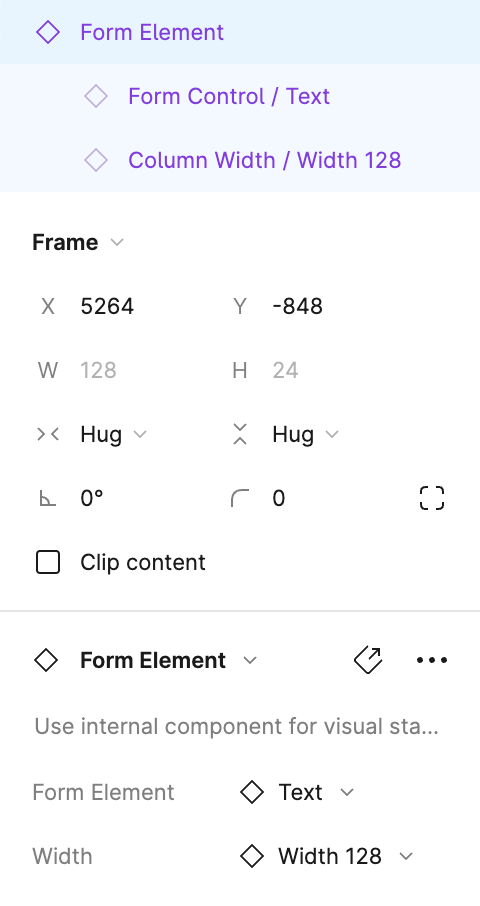
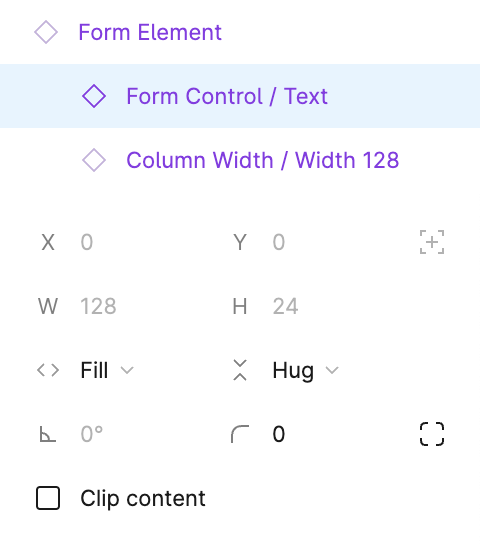
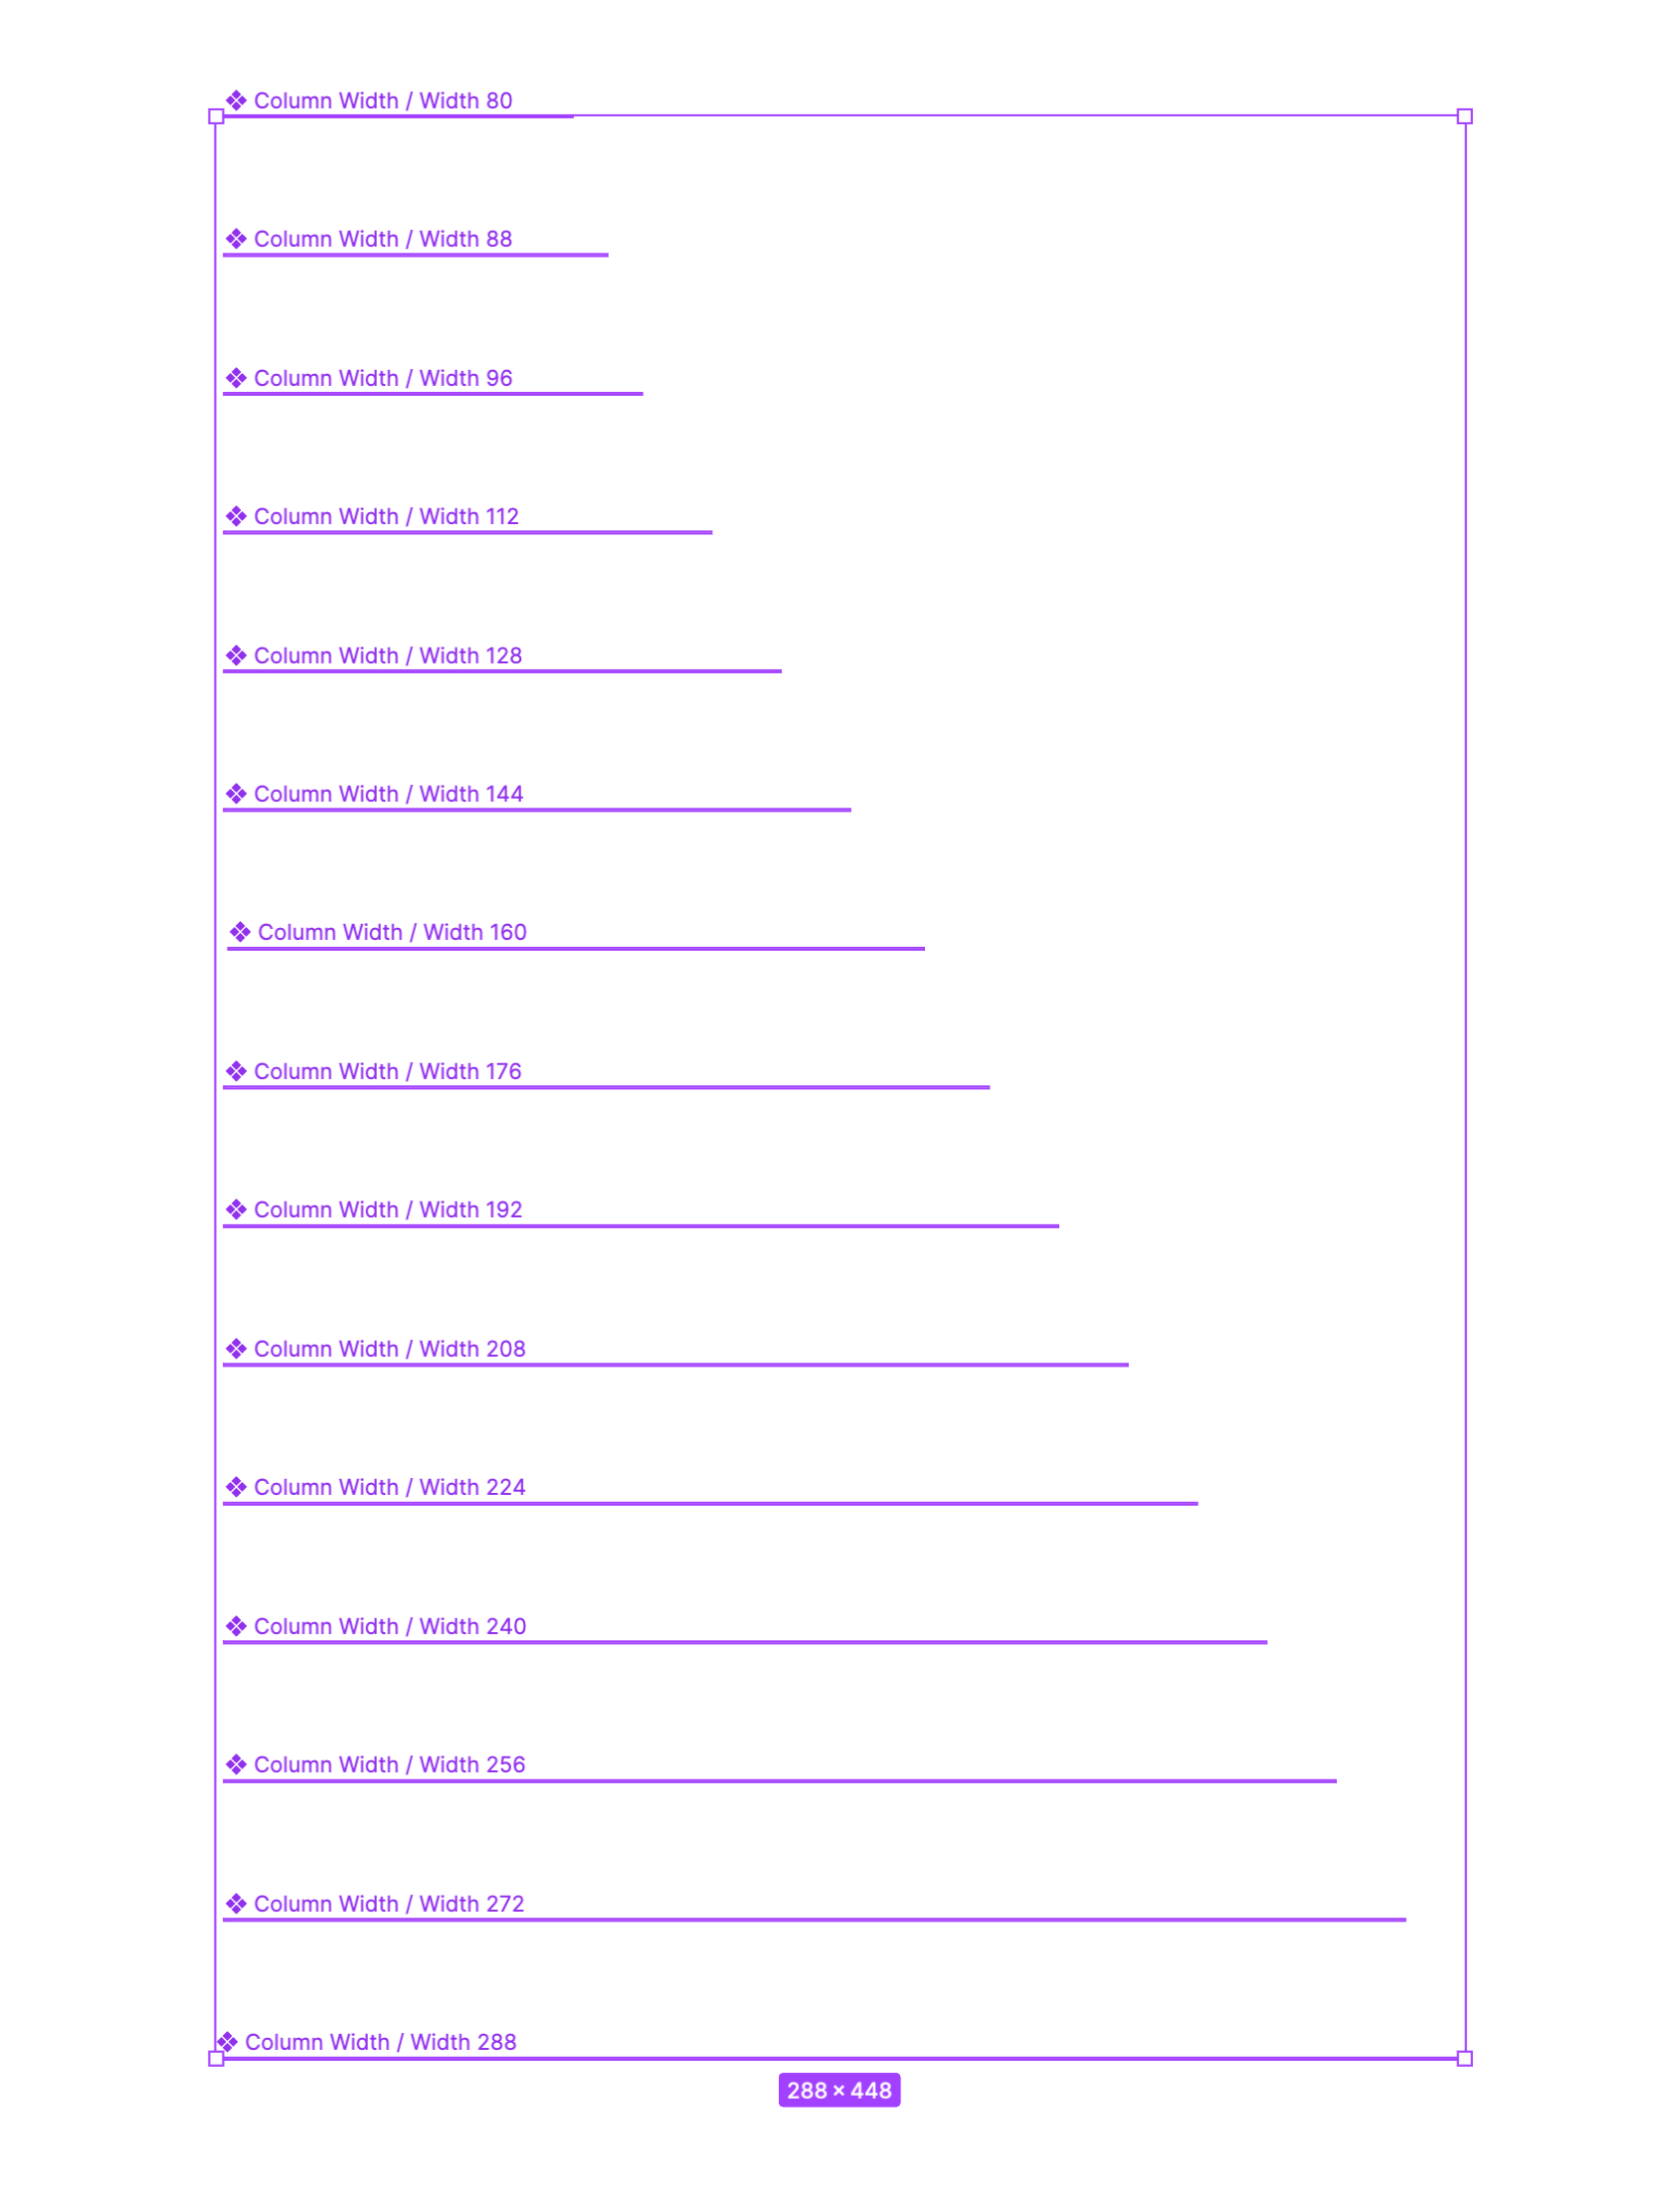
Customize "Fixed width" of the nested instance

Hey there :wave: …is there a way to set a custom “Fixed width” for a nested instance of the component?

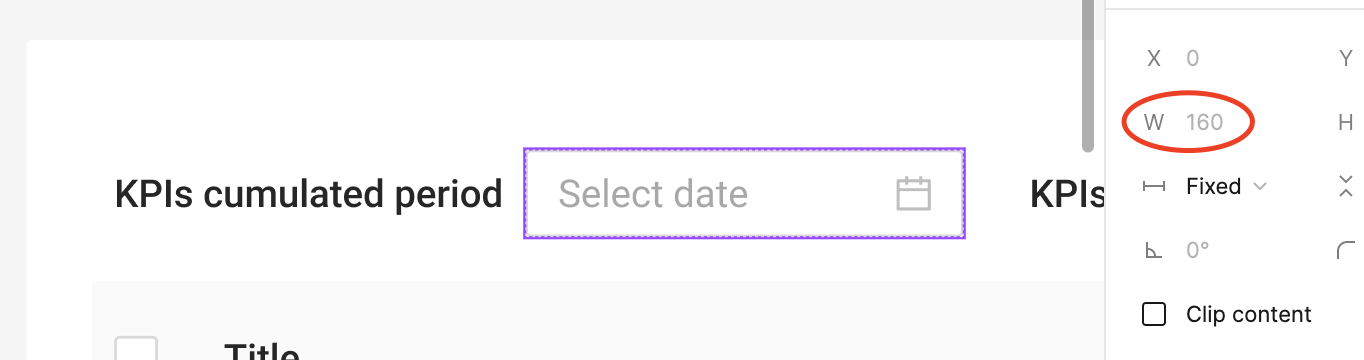
currently i’m just creating other master component (just one level higher) with the necessary width, but i’d like to avoid this method as i have to create new master each time which i think is not a good solution. So i’d like to know if there any other optimal way to set custom width for the nested instance.

1 Like

I have been trying to work this out too…
I am thinking of resorting to making it hug contents and then have a hidden text field with tiny text to adjust the width???
Does anyone know any other hacks?

There is indeed a trick for this! You can use the zero frame method that @Gleb demo’d at Config 2021 in conjuction with @chudoloo’s Resizable Auto Layout Spacer solution. By the way, this will need to be executed on your “date-picker” component, and not your local one. So as long as you have edit access to that you’re good to proceed. The steps for your scenario would be as follows:

  • Create a regular frame, and apply auto-layout to it. Re-name it “Resizer”
  • Add 2 more auto-layout frames inside your new Resizer frame.
  • Remove any padding on the Resizer frame, and using the advabced options in the auto layout panel, change the spacing mode to “Space between.” You should have something like this:

  • Set the Resizer frame’s height-resizing rule to “Fixed” (it was probably on “hug”) and use the height input field in the design panel to enter a height of “0.0001”. This is effectively like entering “0”, but Figma won’t allow for that value so you need to use a teeny tiny decimal.
  • Set the height-resizing rule of the two frames inside the Resizer (these would be the frames with grey fills in my screenshot above) to “Fill.”
  • Set those same two frames width to “0.0001” just like you did for the Resizer’s height earlier.
  • Move the resizer inside the main component of the date picker from your screenshot.

Now without knowing how your date picker is set up I can only guess so much about it’s exact construction, but I’m assuming it’s using auto layout with a horizontal orientation. Maybe your “Select date” text is full width, which pushes the calendar icon to the right no matter the date picker’s width… or perhaps not, and the date picker is using the “Space between” spacing mode to keep the label separate from the icon. Either way, after you drag the Resizer frame into it, something like this will happen:

busted date picker

Don’t freak out, this is part of the process.

  • To fix that, you’ll need to change the auto-layout direction on your date picker component from horizontal to vertical.
  • Then, wrap the “Select date” text object and the calendar icon in an auto layout frame that runs horizontally.
  • Set the width of that frame you just made to “Fill”, and update the auto-layout alignment settings from the default “top left” to “center left” to re-align the label with the icon.
  • You might also need to double check the “Select date” layer’s resizing rules, as they might’ve been changed to “fixed” in this process. Either “fill” or “hug” are fine (I’d choose “fill”).

At this point you your date picker should have a layer structure like this (screenshot taken in outline mode, which you can toggle on/off with Command + Y).

Final steps!

  • Set the “space between” value on the Date Picker component to zero, and set its height and width resizing rules to “hug”.
  • :star: Double check that the zero-height Resizer frame inside your Date Picker component is set to “hug” horizontally, this is the secret sauce needed for this to work!

Now you should be cooking with gas :fire: Peel off an instance, and instead of grabbing one of the outer edges of the date picker instance to resize it, select the “Resizer” frame within (and since it’s barely visible on the canvas I’d recommend using your keyboard to navigate the layers panel, or just select it from the layers panel) and adjust the “Space between” value in the auto layout section of the design panel. You can now set custom widths to any instance of your date picker instances

resizer

And if there’s a case where you need it to be set to “Fill” you still have that option! Here’s view-access to the Figma file I used to take these screenshots and GIFs, in case you’d like to have a closer look at the layers and auto layout settings.

14 Likes

I’m just replying to this to say wow, amazing answer. 10 points for spending so much time on the description, steps and animations!

2 Likes

very kind of you Benjamin :pray: thank you!

Super helpful and it works, thank you!

Thank you for the awesome explanation of this workaround!

Is there anywhere we can go to upvote this functionality as a first-class feature? If I had a nickel for every “0px hack” I’ve found in these forums… I’d be able to acquire Figma.

Haha I hear you. It’s a nice trick when you’re in a pinch, but doesn’t feel like a good long term solution. I also don’t trust that the zero frames will always be stable, Figma could release something that breaks them someday.

I had never considered pitching resizer zero frames as a native feature! I guess I always figured that the easiest fix would be for Figma to allow us to edit widths of nested elements. But I suspect there’s a good reason why they haven’t… hmm. Anyway, I like how you’re thinking. Maybe there’s something possible with variables? Eg what if I set up a date picker that uses a number variable for it’s width, and there’s some kind of extra option, like a checkbox in the design panel, that says “allow overrides to width when nested in other components”? Just spitballing. Curious if you’ve got an idea!

Oh yeah, sorry! My comment wasn’t clear. I wasn’t suggesting we upvote resizer zero frames as a native feature :slight_smile: I was wondering if there was an existing feature request for “edit width/height of nested element.”

I can’t think of any work arounds better than what you’re proposing here. But if I do, will share! Thanks!

1 Like

I wonder if this hack is still necessary since this was back some time ago? I’m hoping there’s a better way now with more recent Figma updates. For example, could this be done somehow with Variables now? Thanks again for your thorough description!