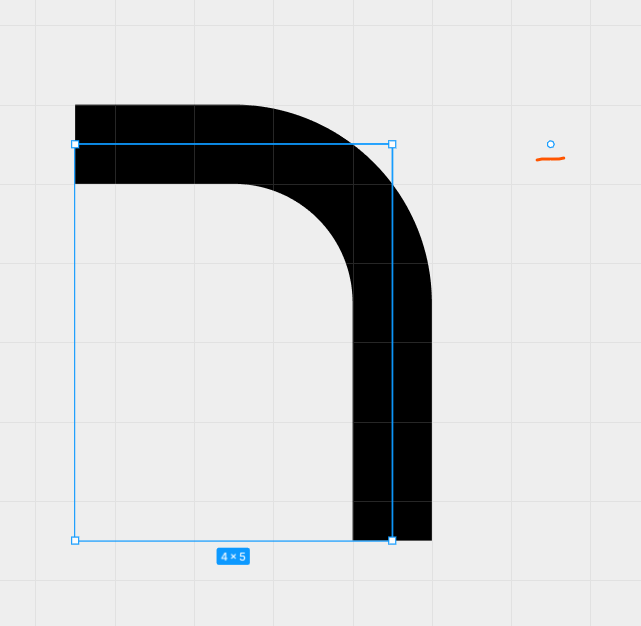
Line vectors are created with 1/2 pixel to it’s left of the center line and another 1/2 pixel to the right of the center line. When creating components, Figma takes the start point of the center line of the vector and the last point of the center line of the vector, and creates the box you showed above, with half a pixel on the outside. Taking this into account and further research, I don’t think there is an appropriate solution for this issue.
Wrap your vector with a stroke in an auto layout frame or add an auto layout property to your component and
Figma Learn - Help Center
Your Stroke is not closed, so options like “Inside” or “Outside”, cannot be applied.
Think of it: Inside relative to what?
If you want to draw a stroke that is 1px wide and don’t fall into the subpixel space, then you have to make your vector into that subpixel:
Note: The red mark shows the vector pen position when approaching to the subpixel grid. The shape on the left succesfully shows a 1 px vector that fills an entire pixel
With the pen tool you can draw directly into the subpixel grid, so when applying a stroke to the vector created it will fill an entire pixel.
Basic shapes will be created inside the regular pixel grid.
To make them go subpixel you can either alter the coordinates X/Y by 0.5px or enter in vector edit mode and move the nodes to the subpixel grid.
Thanks so much @tank666 The auto layout stroke included works just like magic!!!
Okay, you gotta tell me what you recorded that GIF with!
This is a GIF from the “Explore auto layout properties” article in the Help Center.
Dang, the quality is great. So curious how they optimized it.
@Rosieway I don’t know what they used, but I did come across https://gif.ski/ and it seems to do pretty great converting videos to GIFs!
Thanks for the link @Bryce_Driesenga ! The quality is really amazing!!
I am curious @tank666, is this also something that is possible in CSS? Or what is the equivalent in code to achieve this – if you happen to know that.
Border in CSS are directed inside the container. That is, the border property in the CSS = include a stroke in the layout in the Figma auto layout properties.
Ok yeah I thought so, but I do not understand why this is different in Figma?
Thanks for responding to the CSS related question. From what you said, it seems like Figma can reflect what we do on CSS level right?
If so, I got another question (not sure if it’s related), if today we’re going to create a square card that has the radius at 5px with both width and height in 100px. We can create that on CSS right away! But that’s say, if we wanted to enlarge the square into 200px by 200px on CSS, this square’s radius should still remain 5px right? Unless we change the value on the radius.
I ran into another situation that I shared on this post: Resizing an auto-layout and constraints set up elements without stretching on corner radius?
I wonder if it’s the same logic? Thank you very much!!