Hey guys, I’m not even sure how to look this question up here. So apologies if it’s repeated.
I recently started Figma, but I still use Photoshop as I’m more fluent at it, and slowly transferring my workflow (what can be transferrable) to figma.
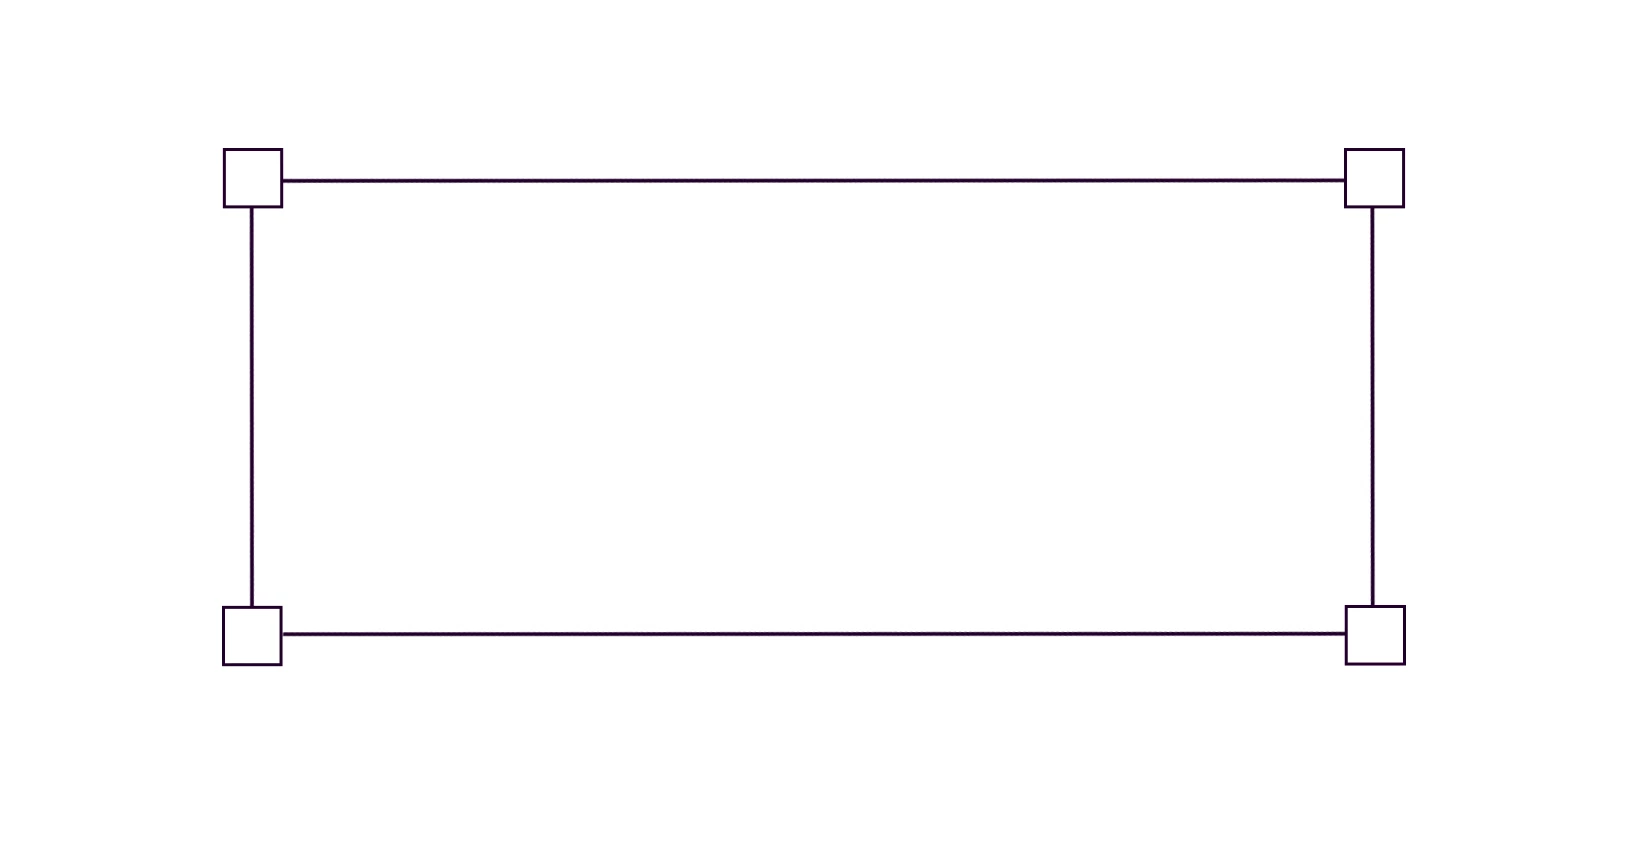
And one of those projects is using this shape in different contexts and sizes. Is there a way to make this on figma so i don’t have to manually grab each square and resize the lines every time?
Hey @DianaA 👋 Thanks for the extra detail and the reference. That helps a lot.
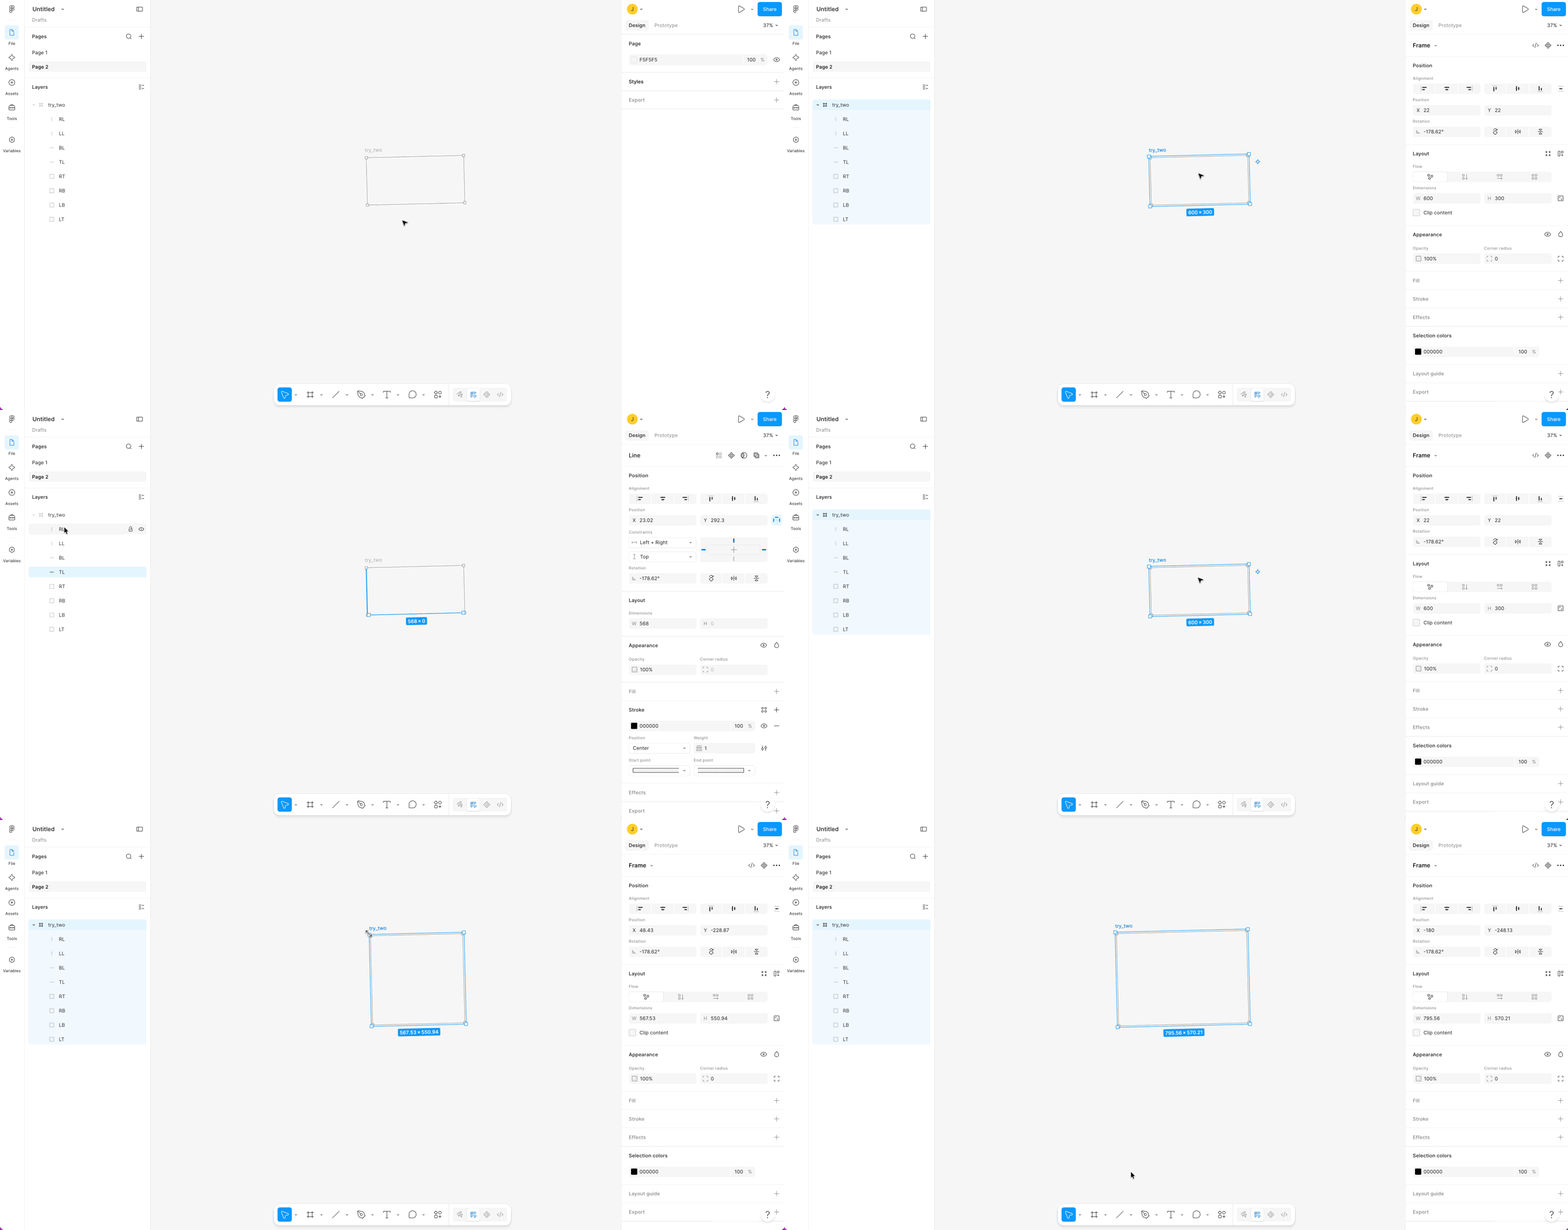
I wonder if Constraints is what you're after? I built a quick example with your corner-bracket shape, and it resizes (and rotates) as one unit without touching each line and square individually.
Here are the steps:
Select your four corner squares and four lines → right-click → Frame selection (must be a frame, not a group—constraints only work in frames).
Select each corner square and pin it to its corner in the Position panel: top-left → Left + Top, top-right → Right + Top, bottom-left → Left + Bottom, bottom-right → Right + Bottom. This keeps them a fixed size.
Select each horizontal line (top/bottom) → set constraints to Left and Right + its edge. This lets them stretch sideways.
Select each vertical line (left/right) → set to Top and Bottom + its edge. This lets them stretch up/down.
Now resize the frame by dragging a corner handle. The squares stay put and the lines stretch to follow. To rotate, hover just outside a corner until the rotate cursor appears and drag. The whole thing turns together.
To export: select the frame and use the Export section at the bottom of the right sidebar (PNG, SVG, etc.).
And if this isn’t what you need, let me know. It won’t hurt my feelings. I love learning. I’ll take it on to my resources and see if theres a better match for your use case.
Hey hey @DianaA 🤩 Thanks for the great question. I’m sure others have wondered the same thing. Let’s dig in together.
Could you share a quick screen recording of how you resize this shape today (in Photoshop or your current tool)? A clip shows what should stay fixed vs. stretch better than a still can.
A couple of questions:
When you resize the whole shape, should the four corner squares stay the exact same size, or scale up/down along with it?
Are you picturing one reusable element you'll drop in at lots of sizes, or just a single shape you want to resize cleanly by hand?
One thing to note: Figma handles "resize and everything holds its position" through a feature called Constraints (Figma Learn) — pinning elements to edges or corners of their parent frame — which might be the concept you're looking for. Constraints help center
When you resize the whole shape, should the four corner squares stay the exact same size, or scale up/down along with it?
The four corners would stay the same, like I can grab one of the square and move it to resize and the rest would follow. Like a simple selection feature except you can move the shape of the selection.
Are you picturing one reusable element you'll drop in at lots of sizes, or just a single shape you want to resize cleanly by hand?
a single shape, a rectangle, just resizing the same shape.
Hey @DianaA 👋 Please let me know if I’m missing something here. We can do (most of) this with shapes and the rotate tool.
The only difference is the look: your example paints all eight grab points, but Figma only shows the four corner dots. The edges still resize — you just hover over them instead of grabbing a visible dot.
Draw a rectangle (press R) and select it
Drag a corner to resize both dimensions
Hover any edge until the resize cursor appears, then drag to resize one side
Hover just outside a corner until the rotate cursor appears, then drag to rotate
That's it — no components or grouping needed. Full reference here.
Hey @Jaycee Lewis I think you misunderstood. The question was how to make that shape as graphics, and export it. If that makes sense. Like the screenshot I shared is literally a photoshop project where i manually drew squares and lines to make them a part of the design. I attached another reference below. I hope that made sense :)
Hey @DianaA 👋 Thanks for the extra detail and the reference. That helps a lot.
I wonder if Constraints is what you're after? I built a quick example with your corner-bracket shape, and it resizes (and rotates) as one unit without touching each line and square individually.
Here are the steps:
Select your four corner squares and four lines → right-click → Frame selection (must be a frame, not a group—constraints only work in frames).
Select each corner square and pin it to its corner in the Position panel: top-left → Left + Top, top-right → Right + Top, bottom-left → Left + Bottom, bottom-right → Right + Bottom. This keeps them a fixed size.
Select each horizontal line (top/bottom) → set constraints to Left and Right + its edge. This lets them stretch sideways.
Select each vertical line (left/right) → set to Top and Bottom + its edge. This lets them stretch up/down.
Now resize the frame by dragging a corner handle. The squares stay put and the lines stretch to follow. To rotate, hover just outside a corner until the rotate cursor appears and drag. The whole thing turns together.
To export: select the frame and use the Export section at the bottom of the right sidebar (PNG, SVG, etc.).
And if this isn’t what you need, let me know. It won’t hurt my feelings. I love learning. I’ll take it on to my resources and see if theres a better match for your use case.
Hey @DianaA 👋 Thanks for the extra detail and the reference. That helps a lot.
I wonder if Constraints is what you're after? I built a quick example with your corner-bracket shape, and it resizes (and rotates) as one unit without touching each line and square individually.
Here are the steps:
Select your four corner squares and four lines → right-click → Frame selection (must be a frame, not a group—constraints only work in frames).
Select each corner square and pin it to its corner in the Position panel: top-left → Left + Top, top-right → Right + Top, bottom-left → Left + Bottom, bottom-right → Right + Bottom. This keeps them a fixed size.
Select each horizontal line (top/bottom) → set constraints to Left and Right + its edge. This lets them stretch sideways.
Select each vertical line (left/right) → set to Top and Bottom + its edge. This lets them stretch up/down.
Now resize the frame by dragging a corner handle. The squares stay put and the lines stretch to follow. To rotate, hover just outside a corner until the rotate cursor appears and drag. The whole thing turns together.
To export: select the frame and use the Export section at the bottom of the right sidebar (PNG, SVG, etc.).
And if this isn’t what you need, let me know. It won’t hurt my feelings. I love learning. I’ll take it on to my resources and see if theres a better match for your use case.