
Dsync
New Member
Oct 19, 2026 9:36 PM UTC
Solved

Creating a button with a custom image that expands as you type

 Hello. I am a newbie. I finished the Beginner Figma Design course. I know how to make a button that expands with the outline around it but I am trying to make one with a specific shape. I know I’m missing something. Please help! Please see below for screenshots and the link to the project Im working on if you need to see something there.  The more specific the better as I am still learning. TIA!
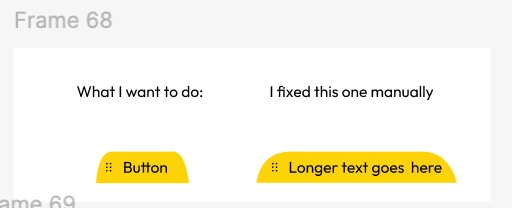


This is what happens:
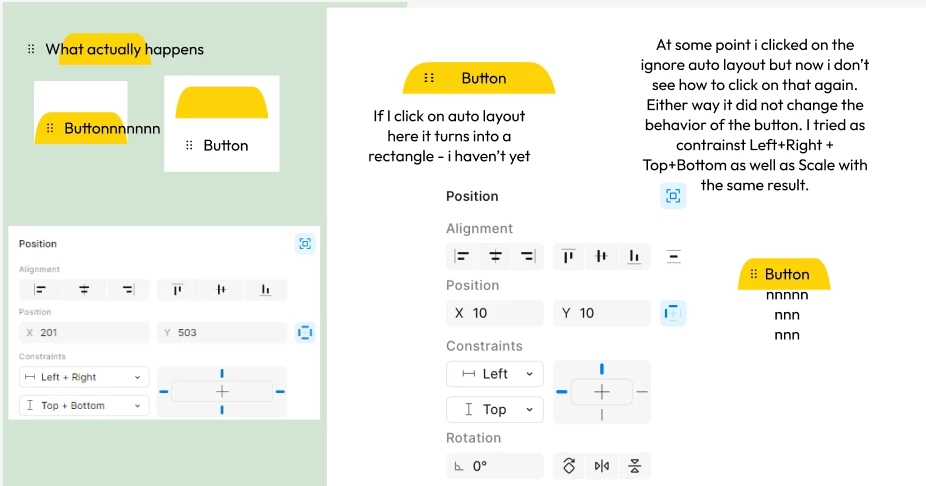


I tried to reproduce the settings suggested in a different thread but I’m missing something:
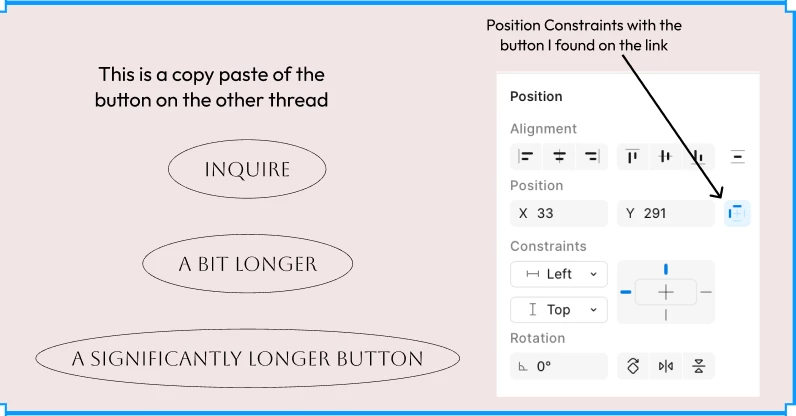
The link to the thread I referenced: 


The link to the page I’m working on: 



    Ondrej_Pavlicek
    Figma Ambassador
    Oct 20, 2026 8:59 PM UTC

    Glad it helped! 😊

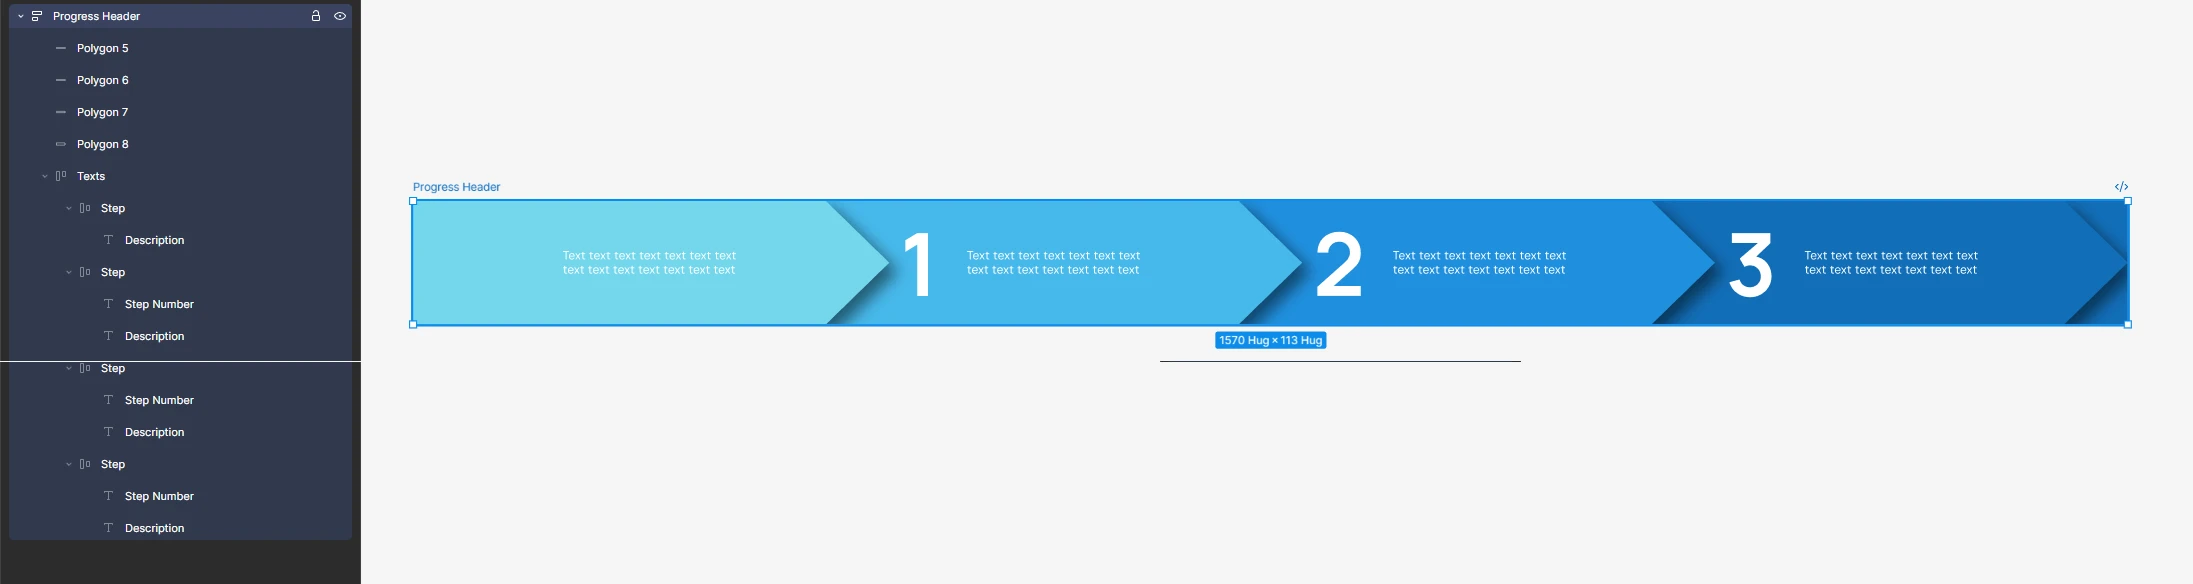
    It’s a bit different here, because auto layout doesn’t work well with arrow shapes. The easiest way is to keep the arrows and the texts in separate layers:

    • Arrows: draw them as polygons, give each one a darker shade and a drop shadow, and let them overlap.
    • Texts: put them in a horizontal auto layout on top of the arrows, with each Step (number + description) as its own frame, so the text can be centered in each step.

    The only downside is that the arrows don’t resize with the text, so if you change the text length, you’ll need to adjust them manually.

    Here’s how it can look:


    Product designer @ NETWORG | Designing Model-driven Power Apps in Figma | Power Apps DesignKit (Model-driven) | Disclosure: I’m part of Figma’s Forum Ambassador program.

    4 replies

    Ondrej_Pavlicek
    Figma Ambassador
    Figma Ambassador
    Oct 20, 2026 8:34 AM UTC

    Hi!

    You don't need a separate background shape or "Ignore auto layout" for this. When you add Auto layout directly to a custom shape, Figma turns it into a normal rectangle. That is why it wasn't working for you.

    Instead, just create a normal Auto layout frame with only your Icon and Button text inside.

    Then, select the Button frame and set these options in the right panel:

    • Add a yellow Fill (#FDD307) directly to the Button frame.
    • Set both width (W) and height (H) to Hug.
    • Under Appearance, click the Individual corners icon (highlighted in blue on the right) and set the top two corners to 20 and the bottom two corners to 0.

    This gives you the same shape directly on the Auto layout frame, and the button will automatically grow as you type more text.

    Hope it helps! 😊

    Product designer @ NETWORG | Designing Model-driven Power Apps in Figma | Power Apps DesignKit (Model-driven) | Disclosure: I’m part of Figma’s Forum Ambassador program.
    Dsync
    DsyncAuthor
    New Member
    Oct 20, 2026 4:41 PM UTC

    ​@Ondrej_Pavlicek 


    Thank you!  I had spent hours trying to figure it out and it was so simple! Thank you so much!

    One more question. Would the process be the same if I wanted to do something like this:


    Ondrej_Pavlicek
    Figma Ambassador
    Figma Ambassador
    Oct 20, 2026 8:59 PM UTC

    Glad it helped! 😊

    It’s a bit different here, because auto layout doesn’t work well with arrow shapes. The easiest way is to keep the arrows and the texts in separate layers:

    • Arrows: draw them as polygons, give each one a darker shade and a drop shadow, and let them overlap.
    • Texts: put them in a horizontal auto layout on top of the arrows, with each Step (number + description) as its own frame, so the text can be centered in each step.

    The only downside is that the arrows don’t resize with the text, so if you change the text length, you’ll need to adjust them manually.

    Here’s how it can look:


    Product designer @ NETWORG | Designing Model-driven Power Apps in Figma | Power Apps DesignKit (Model-driven) | Disclosure: I’m part of Figma’s Forum Ambassador program.
    Dsync
    DsyncAuthor
    New Member
    Oct 20, 2026 3:26 PM UTC

    It did! I had spent hours trying to figure it out and it was so simple! Thank you so much!