I am an experienced designer so I’m guessing this is something Figma just can’t do because I can’t seem to figure it out. I’d like to build this alert bubble as responsive so I’d like to apply autolayout. It’s pretty straight forward but this has a speech-bubble-like design with the triangle on the outside.
I’d like to apply union to the triangle and the rectangle then apply autolayout so that it is responsive but that is obviously not possible. I wanted to know if there is a workaround for something like this.
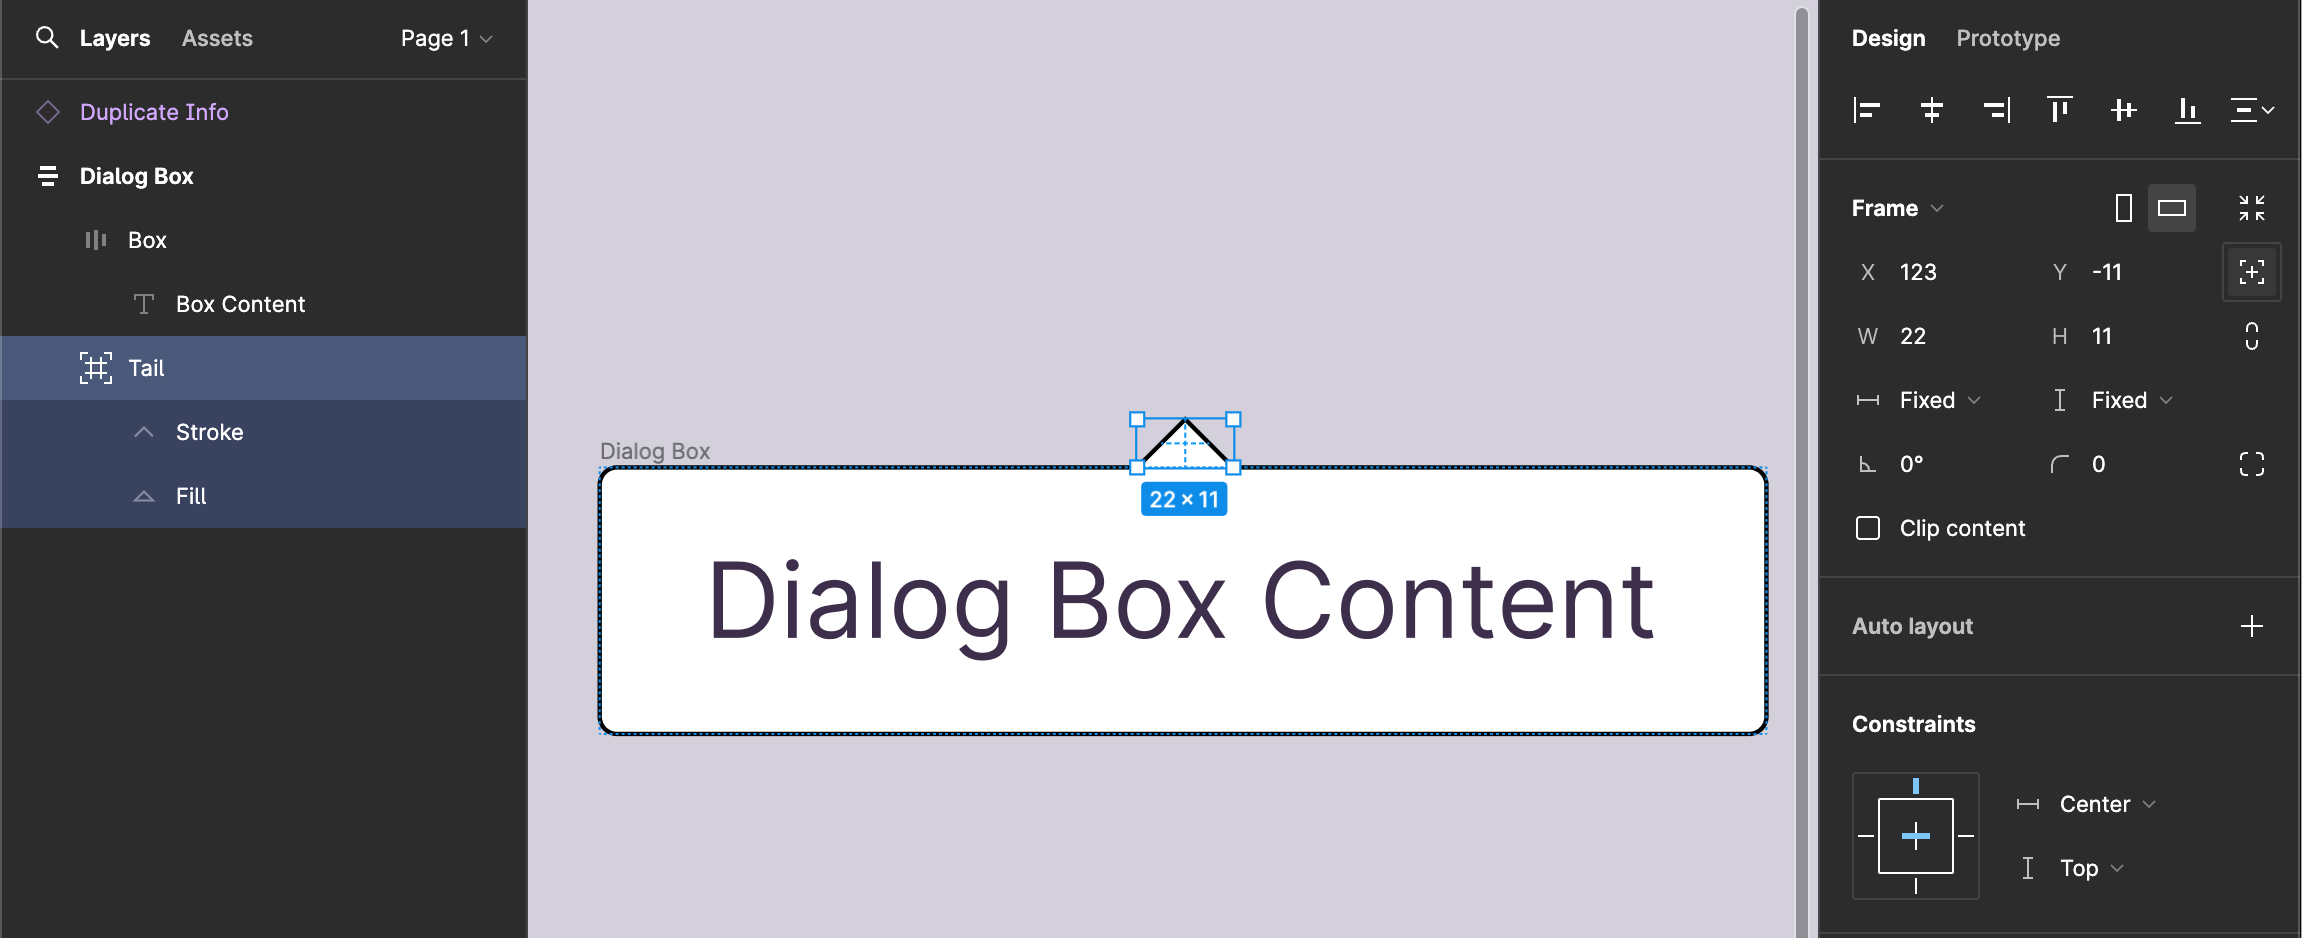
Create the tail out of 2 elements within a frame (stroke + fill)
Add the tail to the dialog box’s auto-layout
-Set it to absolution positioning.
-Position it where you want in relation to the dialog box.
-Move the tail slightly down to overlap the box
-Set the tail’s constraints as needed — in my example I centered the tail above the box and then set its contraints to “center/top”. This keeps the tail center to the top as the box changes width/height.